Replacing rod bearings in a 3.2L VR6 engine demands precision to avoid issues like the “Number 2 Spun Bearing,” a common problem caused by oil starvation. This guide walks you through how to replace rod bearings in 3.2l vr6, using real-world techniques from mechanics. Proper steps include marking bearing caps to ensure correct reassembly, using tools like metric wrenches and the VAG 3278 piston tool, and following torque specs like 30 Nm plus ¼ turn. The 3.2L VR6 rod bearing replacement process also requires checking cylinder bores for damage and following safety steps like securing the engine with a support bar.
Key Takeaways
- Mark bearing caps to avoid misalignment during reassembly.
- Use specialized tools like the VAG 3278 for safe piston installation.
- Follow torque specs: 30 Nm plus ¼ turn for bolts.
- Check cylinder bores for scoring during disassembly.
- Include safety gear and engine stabilization in your prep work.
Understanding the 3.2L VR6 Engine
Before starting DIY rod bearings work, familiarize yourself with the 3.2L VR6’s layout. This engine powers many Volkswagen and Audi vehicles, combining power and complexity. Its V-shaped design positions cylinders in two angled banks, creating a compact yet robust setup.
Engine Overview
Developed in the early 2000s, this engine uses forged crankshafts and pressurized lubrication systems. Its design prioritizes smooth power delivery, but wear on rod bearings can disrupt this balance. Knowing its architecture helps avoid costly errors during repairs.
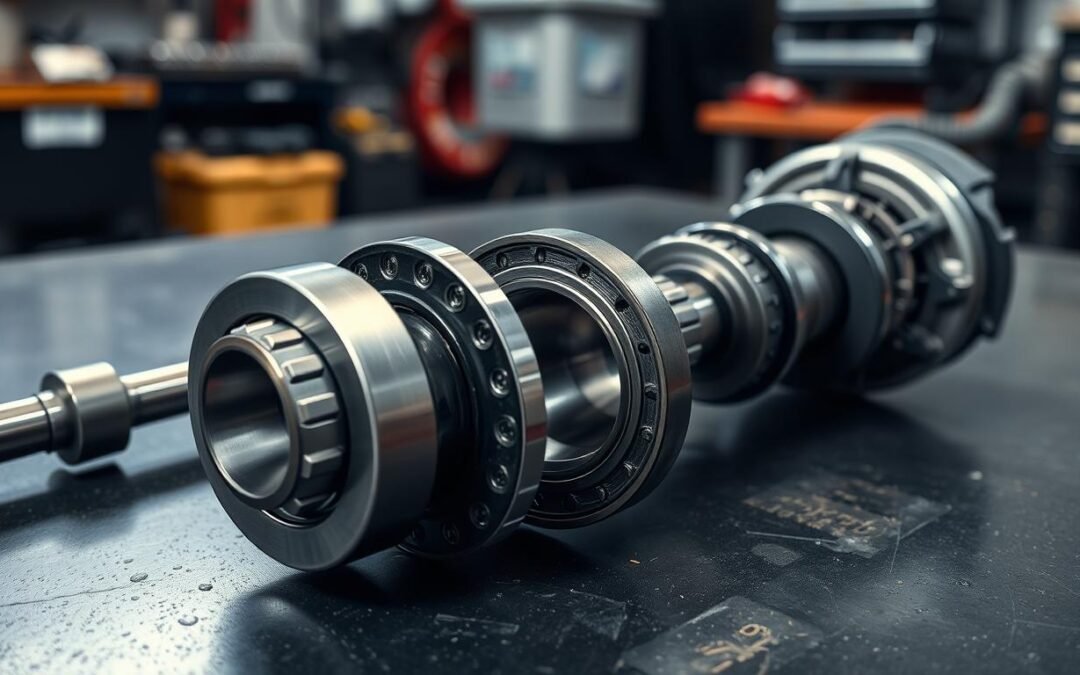
Key Components
Focus on these parts when working on DIY rod bearings:
- Bearing caps: Secure rod bearings to the block. Misalignment here causes engine failure.
- Crankshaft journals: These shaft surfaces must match bearing clearances for proper oil flow.
- Connecting rods: Metal arms linking pistons to the crankshaft. Their bearings are critical for rotational stability.
Thrust bearings control crankshaft movement, while mounting surfaces must be clean to prevent leaks. Properly handling these parts ensures long-term engine health during DIY rod bearings work.
Essential Tools and Materials
Before starting your engine repair DIY project, gather every tool and part needed. Missing even one item could delay progress or cause errors. Let’s break down what you’ll need:
| Tool Type | Name | Use |
|---|---|---|
| Basic | Socket set, wrenches, pry bar | Handle common disassembly tasks |
| Specialized | Micrometer, torque wrench, dial indicator | Ensure precise measurements and alignment |
Don’t forget materials like new bearings, engine oil, and cleaning supplies. A engine repair DIY kit often includes crush sleeves and gaskets. Quality matters: cheap bearings risk premature failure, while a faulty torque wrench may lead to improper tightening.
Pro tip: Store all items in a clean, well-lit workspace. Label parts as you remove them to avoid confusion. Cross-reference your vehicle’s manual to confirm part compatibility. Taking photos during disassembly helps during reassembly.
Preparing Your Workspace and Safety Tips
Before diving into VR6 engine troubleshooting or disassembly, your workspace must be organized and safe. A cluttered area or ignored safety steps could lead to costly errors or injuries. Follow these guidelines to set up a secure environment.

Workspace Preparation
Start by clearing all debris with compressed air and microfiber cloths. Use magnetic trays to keep small parts like bolts and bearings separate. Elevate the engine block on foam mats to avoid scratches. Proper setup reduces contamination risks tied to VR6 engine troubleshooting later.
Safety Precautions
- Secure the engine with clamps to prevent slipping.
- Use jack stands rated for vehicle weight when lifting components.
- Keep flammable materials away from open areas.
- Work in a ventilated space to avoid fume inhalation.
Personal Protective Equipment
| Item | Purpose |
|---|---|
| Heat-resistant gloves | Protect hands from sharp edges and hot parts |
| Safety goggles | Shield eyes from flying debris |
| N95 respirator | Filter hazardous particles during sanding or grinding |
| Steel-toe boots | Guard against heavy component drops |
A clean workspace and proper gear minimize risks and reduce the need for VR6 engine troubleshooting post-installation. Prioritize these steps to ensure a smooth repair process.
Step-by-Step Disassembly Process
Before tackling rod bearings, start by disconnecting the battery and draining engine oil. Use a socket set to remove spark plugs and timing covers, following manufacturer diagrams. Work systematically to avoid confusion later.
- Unbolt cylinder heads and lift them carefully using a hoist. Mark each head’s position with labels like “cylinder 1” or “cylinder 2.”
- Remove bearing caps with a magnetic socket. Clean all mating surfaces with a wire brush to expose bare metal for accurate bearing installation tips.
- Inspect oil passages with a flashlight. Use compressed air to remove debris, ensuring no residue blocks lubrication paths.
“Label every part before removal—this prevents misalignment during reassembly.”
Document each step with photos. Check rod journals for scoring and note wear patterns. Apply a thin layer of clean engine oil to bearing surfaces before storage. Review bearing installation tips from manuals for specific torque specs. Never force components; misalignment here can ruin new bearings.
Work in a dust-free area to prevent contamination. Store removed fasteners in labeled containers. Double-check clearance gaps with feeler gauges before proceeding to installation.
How to Replace Rod Bearings in 3.2l vr6
Proper bearing replacement is key to cost-effective engine maintenance. Follow these steps to ensure longevity and reliability without overspending on repairs.
Removal of Old Bearings
- Use a mechanical puller to extract bearings. Avoid hammering, which can damage the crankshaft or housing.
- Clean bearing seats with 3M Scotch-Brite pads to remove corrosion and debris. Wipe surfaces dry afterward.
- Inspect seats for scoring. Light machining may be needed if severe wear is found.
Installation of New Bearings
- Apply manufacturer-recommended lubricant to new bearings. Use a brush to spread evenly across surfaces.
- Align bearing halves so oil holes line up with engine block pathways. Misalignment voids warranties on premium bearings like Federal-Mogul or Mahle.
- Install bearing caps in sequence, torquing to factory specs with a calibrated wrench.
Lubrication and Alignment Tips
“Incorrect torque values can cause bearing failure within 50 miles,” warns the Bosch Engine Repair Handbook. Verify specs in your service manual.
- Check bearing clearance with feeler gauges to ensure proper fitment.
- Test crankshaft rotation manually after installation but before final assembly.
- Reassemble engine components in reverse order while avoiding cross-threading bolts.
Following these steps reduces the need for repeated repairs, aligning with cost-effective engine maintenance goals.
Troubleshooting Common Issues
Even with a solid DIY engine guide, challenges can arise. Here’s how to spot and fix them:

- Uneven Bearing Wear: Check clearance specs. Use feeler gauges to ensure even spacing between bearings and crankshaft journals. Reinstall bearings if measurements vary by more than 0.001 inches.
- Misaligned Bearings: Verify bearing caps are seated fully. Use a torque wrench to tighten bolts to factory specs—common specs for VR6 engines are 12-15 ft-lbs per cap bolt.
- Poor Crank Rotation: Inspect bearing surfaces for debris. Clean with solvent and lint-free cloths. Re-lube bearings with fresh engine oil before assembly.
| Issue | Action |
|---|---|
| Knocking noises after startup | Double-check bearing alignment and torque sequence |
| Oil leaks near bearings | Replace gaskets and ensure sealant is applied per manual |
| Engine overheating | Confirm coolant flow and thermostat function post-rebuild |
Always cross-reference steps with your vehicle’s service manual. If unsure, consult a mechanic for clearance measurements. A DIY engine guide works best when paired with patience and precise tools. Regular post-repair checks prevent recurring issues.
Post-Replacement Engine Maintenance
Proper upkeep after how to replace rod bearings in 3.2l vr6 ensures long-term engine health. Regular inspections and maintenance prevent premature wear, safeguarding your investment. Follow these guidelines to maintain optimal performance.
Routine Check-ups
Check oil levels and quality every 500 miles. Inspect for leaks near the crankshaft and rod assembly. Use a torque wrench to verify bolt tightness at 1,000-mile intervals. Monitor engine noise—smooth operation indicates proper bearing alignment.
Signs of Wear
- Knocking sounds during acceleration
- Increased oil consumption
- Unusual vibrations at idle
- Dark or gritty oil residue
Regular Maintenance Schedule
| Task | Frequency |
|---|---|
| Oil and filter change | Every 3,000 miles |
| Crankshaft clearance check | Every 10,000 miles |
| Valve adjustment | Every 15,000 miles |
| Bearing clearance re-measurement | Every 20,000 miles |
Adhere to Volkswagen’s recommended specifications for clearance and axial play. Clean engine bays quarterly to avoid debris buildup. Consult your workshop manual for torque values when adjusting components.
Cost and Time Considerations for DIY Replacements
Replacing rod bearings in a 3.2L VR6 engine involves more than just technical skill. Budgeting and time management are key to a successful project. Let’s break down the practical steps to keep your repair on track.
Budgeting Your Repair
- Parts cost: Bearings alone range from $20 to $300, but add gaskets, seals, and engine assembly lube for a total parts budget of $10–$3,000.
- Tools: Invest in essential tools like presses, torque wrenches, and micrometers. Rental options can reduce upfront costs for rare equipment.
- Hidden expenses: Avoid rushed decisions—cheap bearings may fail, adding rework costs. Always verify part compatibility with your VR6 engine.
Time Management Tips
Time management prevents rushed mistakes. Follow this plan:
- Set aside 8–12 hours for disassembly, inspection, and reassembly.
- Break tasks into daily sessions if needed—don’t rush precision steps like bearing installation.
- Account for unexpected delays, like locating hard-to-reach bolts.
“Plan for double the time you think you’ll need. A rushed bearing install can turn a $500 project into a $3,000 rebuild,” warns a veteran mechanic.
Stick to a realistic schedule. Prioritize quality over speed to avoid redoing work. With careful planning, a well-executed 3.2L VR6 rod bearing replacement can stay within budget and timeline.
Conclusion
Replacing rod bearings in your 3.2L VR6 engine requires precision, but this DIY guide has provided all the tools and steps needed. Follow the outlined process carefully, from disassembly to proper lubrication. Prioritizing safety and attention to detail ensures a smooth repair. Remember, even small mistakes can lead to costly damage if overlooked.
Maintaining your engine’s health post-repair is just as vital as the replacement itself. Stick to the maintenance schedule outlined earlier, and watch for early warning signs like unusual noises or oil leaks. Regular inspections extend engine longevity and prevent future complications. When in doubt, consult a certified mechanic—professional guidance is always a smart backup.
DIY rod bearings work best when paired with patience. Take your time during each phase, double-check alignment, and confirm all components fit snugly. Budgeting correctly and allowing ample time for each step reduces stress and improves accuracy. Online forums and owner’s manuals are reliable resources if you need extra clarification.
This guide equips you with the knowledge to tackle this complex task. While challenging, a well-executed repair enhances engine performance and saves repair costs. Stay focused, refer back to the instructions, and celebrate each completed phase. Your efforts will pay off in a smoothly running engine and increased confidence for future projects.